By L8MS Team · Updated 5 Nov 2026
The Photos section holds the site photographs that appear in the report. Each photo can have a title, a description and its own risk ratings.
Upload
Open Photos from the sidebar (under Data) and click Upload Photos. Drag files onto the box or click to browse.
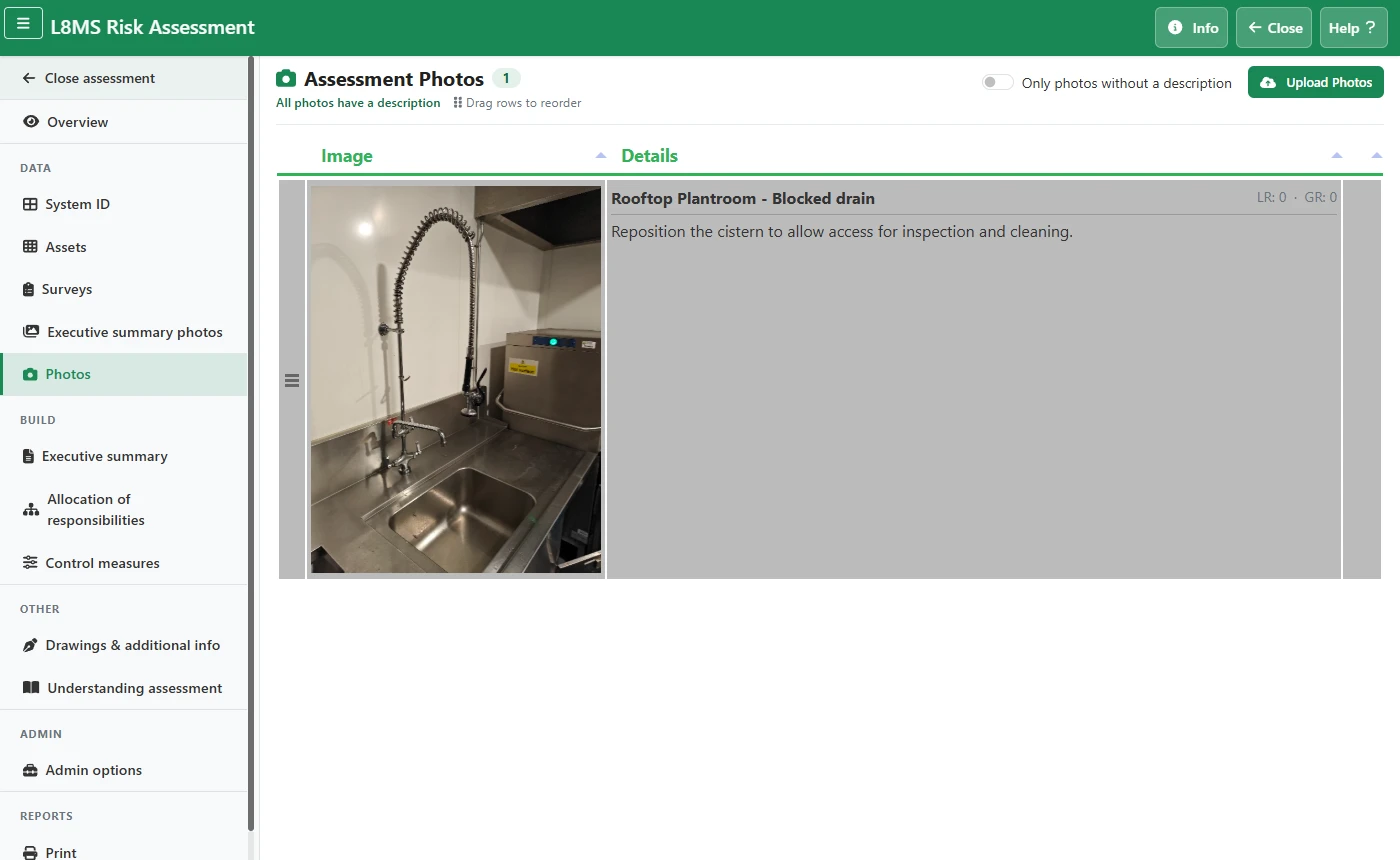 The Photos page.
Accepted formats are JPG, JPEG, PNG, GIF. HEIC (iPhone) photos are not supported — the upload box links to an online converter and explains how to save them as JPEG on the iPhone (Photos › Share › Copy Photos, then paste into a folder in Files). Photos are resized automatically on upload.
Describe each photo
Click a photo to open Edit photo.
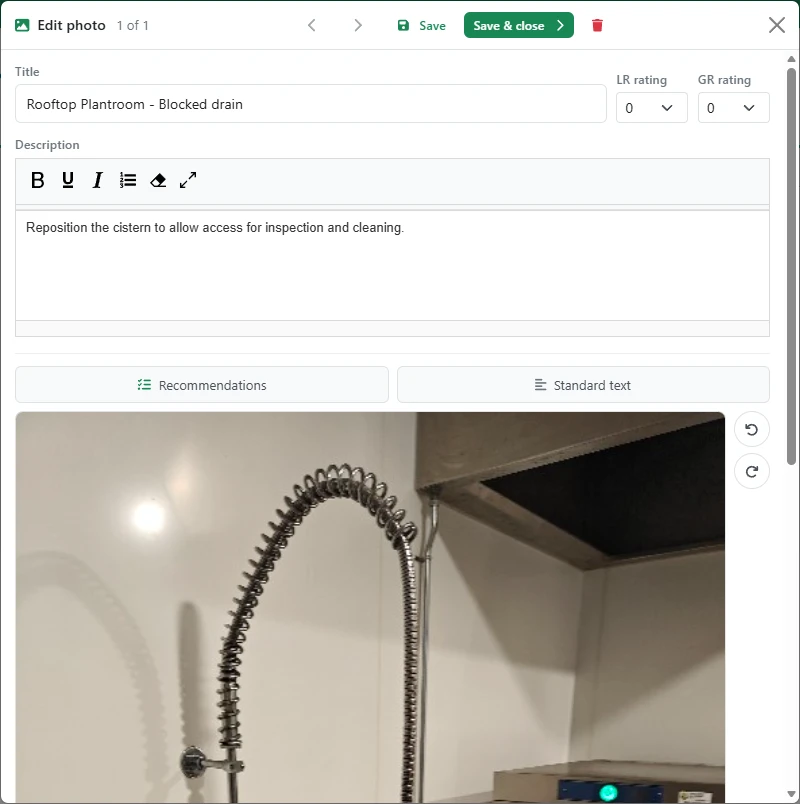 Editing a photo.
Set the Title, the LR and GR ratings, and a Description. Standard text loads saved descriptions; Recommendations finds matching recommendation wording and brings you back to the same photo.
Use the rotate buttons to turn a photo the right way up.
Click Save & next (or press Ctrl+Enter) to save and go straight to the next photo. The arrows at the top move to the previous or next photo; the save button saves and closes; the bin deletes the photo.
Find the ones still to doPhotos without a description are marked in the list, and the header counts them. Turn on Only photos without a description to list just those — then Save & next works through them in turn.
Reorder
Photos appear in the report in list order. Drag a row by its handle to move it, or open the photo, type a number in Position (“of 24”) and click Move.
Executive summary photos are separatePhotos for the executive summary are managed on their own page — see Executive summary photos.