By L8MS Team · Updated 5 Nov 2026
Users (in the menu) lists everyone on your account, with a count next to the title. Use Search users to find someone; a Locked badge shows accounts that are locked out.
Add a user
Click Add User. Choose the Company, enter the Username (their email address — this is what they sign in with) and a Contact Email (used for two-factor authentication).
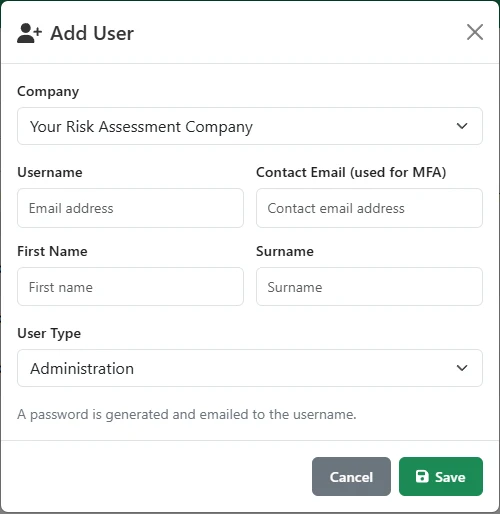 Adding a user.
-
Pick a User Type:
- Administration — full access, including this Administration menu.
- Assessor (plus) — assessor with extra rights.
- Assessor — creates and works on assessments.
- Client — read-only; sees assessments but cannot change them.
Add the First Name and Surname and click Save. A password is generated and emailed to the username; they choose their own when they first sign in.
Edit, restrict, unlock, delete
Each row has its own buttons:
- Edit — change the username, contact email, name and User Type, and link the user to an Assessor record. The Account locked tick box locks or unlocks the account.
- Restrictions — choose which assessments they can see; see How to restrict what a user can see.
- Unlock — shown only on a locked account; lets a locked-out user sign in again.
- Delete — removes the user. For someone who belongs to more than one of your companies the button reads Remove, and takes them out of this company only.
A few rulesYou can’t change your own user type, or lock or delete yourself. Usernames must be unique across L8MS.
Deleting can’t be undoneWhen someone leaves, deleting stops them signing in. If you might need them again, lock the account instead.