By L8MS Team · Updated 5 Nov 2026
Create in the menu opens a five-step wizard: Client, Site, Assessor, Details and Review. Move through it with Next / Back, or click a step on the progress bar. If anything is missing, a Please fix the following list tells you what.
Before you startYou need permission to create assessments, and a credit for the assessment type — the wizard shows your balance when you choose the type. See Company credits.
Step 1 — Company, type and client
Choose the Company and the Assessment Type first. The type sets the survey templates and which credits are used; the company decides which recent clients, sites, assessors and standard text you are offered.
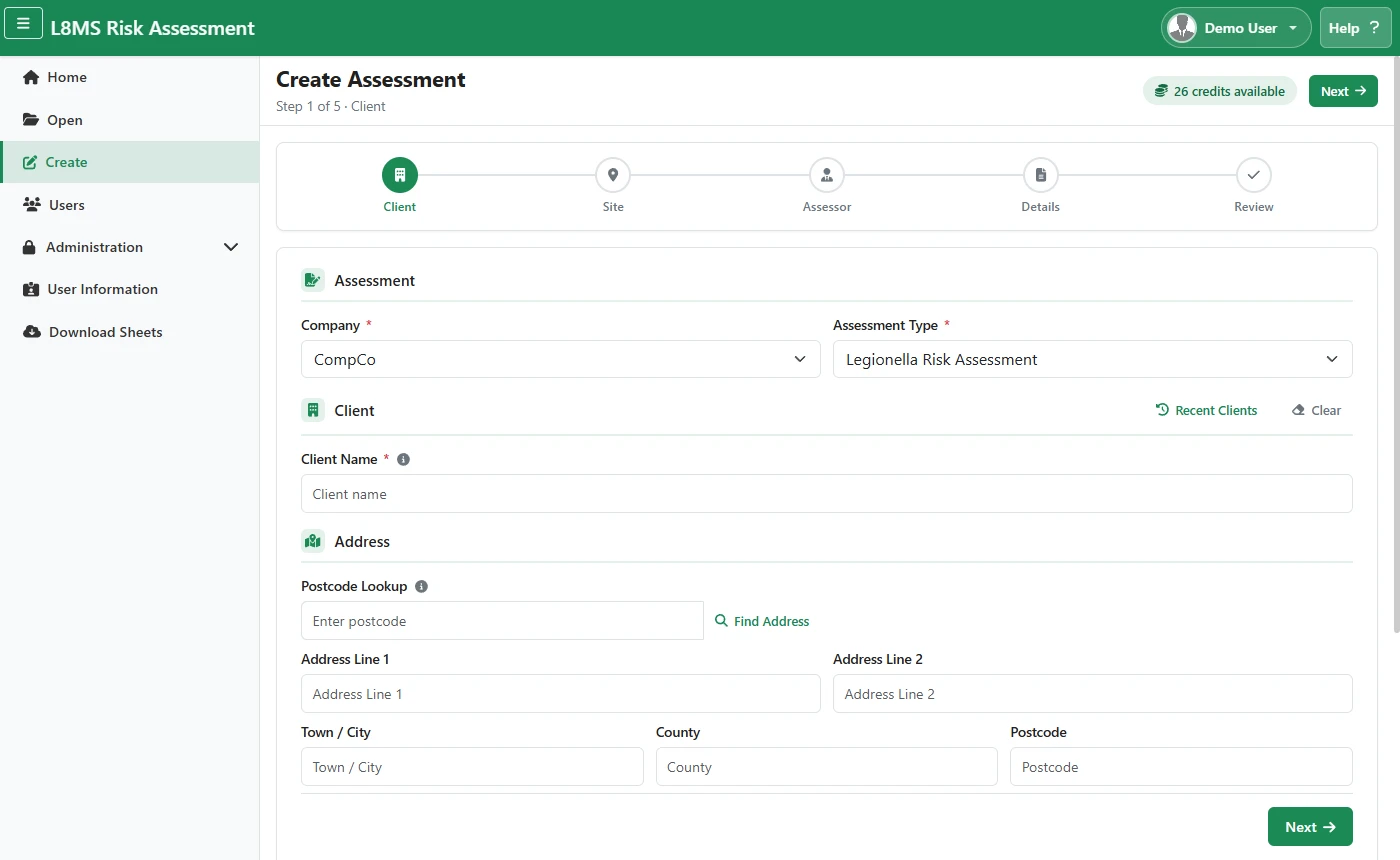 Step 1 — Company, type and client.
Enter the Client Name, or click Recent Clients and search for one you have used before — it fills in the rest. Clear empties the client fields.
Fill in the address, or type a postcode, click Find Address and pick from Select Address. Add the contact details.
Step 2 — Site
If the site is the client’s own premises, tick Site is the same as the client to copy the name, address and contact across.
Otherwise enter the Site Name, address (postcode lookup works here too) and site contact. Recent Sites works like Recent Clients.
Step 3 — Assessor
Enter the Assessor Name and contact details, or use Recent Assessors.
Write the Competence Statement, or click Standard Competence to choose one of your saved paragraphs.
Step 4 — Details
Write the Scope of Works, or load saved wording with Standard Scopes.
Add any Comments — Standard Comments gives you saved text.
Step 5 — Date, reference and review
Set the Assessment Date. Optionally add an Assessment Reference — your own job or document number (e.g. 001/RA003). It shows in the assessment list and on the report footer.
Check the Summary, then click Create Assessment. The new assessment opens on its overview page, ready for systems, assets and surveys.
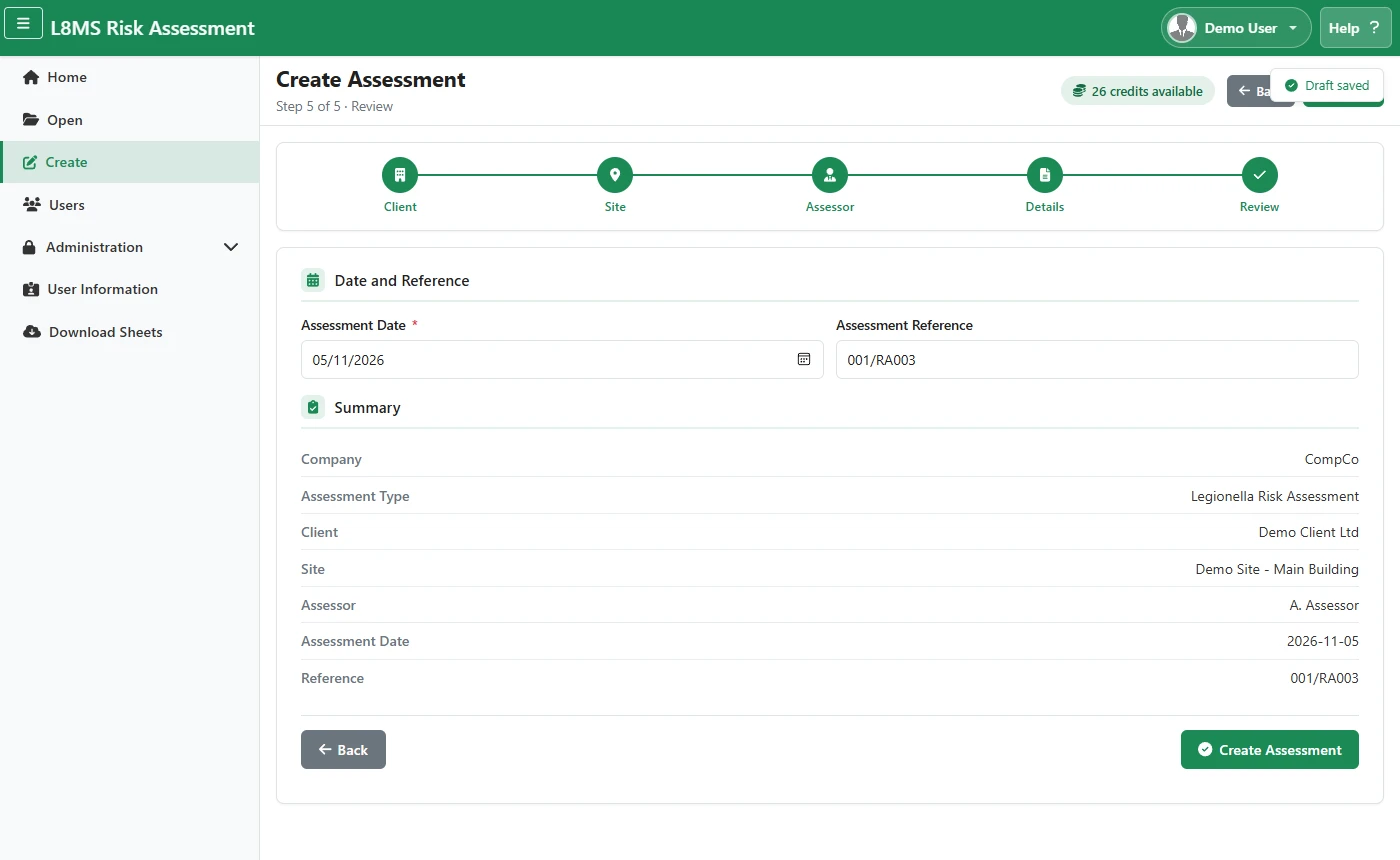 Step 5 — Review.
Unfinished assessments are keptWhat you type is saved in your browser as you go. If you leave before creating, the next time you open Create you are offered Resume or Discard. It is kept on that computer and browser only.
No duplicatesIf an assessment already exists for the same client, site, date and type, it is not created again — open the existing one instead.
Pick the assessment type carefullyThe type sets the template for the whole assessment and cannot easily be changed afterwards.